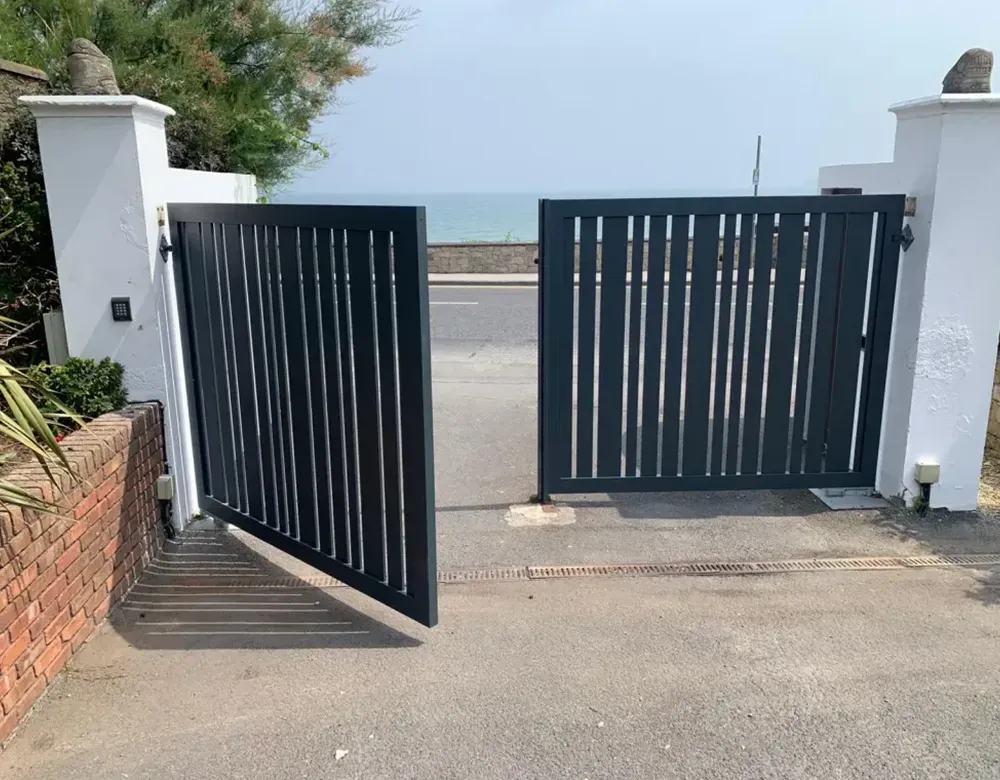
How to Install an Electric Gate Opener?
Installing an electric gate opener can enhance security and convenience for your property. With the right tools and careful attention, you can successfully install an electric gate opener yourself or know what to expect when hiring a professional. This guide will walk you through the process of how to install an electric gate opener, ensuring a smooth, efficient setup. At Lift Monster, we offer expert electric gate installation services.
Step-by-Step Guide
Step 1: Choose the Right Electric Gate Opener
Before beginning installation, it's essential to select the proper gate opener that matches the gate's size, weight, and design. Electric gate openers come in different types:
- Swing gate openers for gates that open inward or outward.
- Sliding gate openers for gates that slide horizontally.
Ensure that the opener you choose is compatible with the gate's material and the level of automation you desire.
Step 2: Gather the Necessary Tools
To install the electric gate opener, you'll need the following tools:
- Wrenches and screwdrivers
- Electric drill
- Measuring tape
- Wire connectors
- Level
Having these ready before starting will streamline the process and help avoid interruptions.
Step 3: Mount the Opener
For swing gates, attach the gate opener's arms to both the gate and post, ensuring they are level. For sliding gates, position the opener’s motor unit on one side of the gate. Be sure to follow the manufacturer’s specific mounting instructions, as proper alignment is crucial for smooth operation.
Step 4: Install the Control Box
The control box regulates the gate opener’s functions. Mount it in a secure location near the gate, typically on a nearby post. Make sure it is easily accessible for programming and maintenance but protected from weather elements.
Step 5: Connect Electrical Wiring
Connect the power supply to the control box and gate opener, ensuring the wiring is safely installed underground or in weatherproof conduits. If you’re not familiar with electrical work, it's best to consult or hire an electrician to ensure a safe and compliant installation.
Step 6: Test and Program the Opener
After completing the installation, it’s time to test the gate opener:
- Program the remote controls or keypad.
- Test the gate's opening and closing mechanism, ensuring the motion is smooth.
- Adjust the gate's sensitivity settings as needed to avoid accidents or damage.
Step 7: Set Up Safety Features
Safety features such as sensors or photocells are essential to prevent accidents. These devices detect obstacles in the gate's path and halt the gate’s movement to avoid injury or damage. Ensure these features are properly installed and functioning.
Step 8: Maintenance and Final Adjustments
After installation, conduct regular maintenance on the gate opener. Lubricate moving parts, check for proper alignment, and make adjustments as necessary. Regular maintenance ensures longevity and reliable performance.
Why Choose Lift Monster for Electric Gate Opener Installation?
At Lift Monster, we specialize in electric gate opener installations, ensuring you get a reliable and secure setup. With our expertise, you can trust that your gate opener will be installed to the highest standards, offering you peace of mind and long-lasting performance. Contact us today for professional assistance or further inquiries.
LiftMonster BLOG